Article #2
In the first article we showed a detail drawing for a concrete foundation and monolithic slab as one method of building your strawbale home. If you want to read a previous article, click one of the links at the bottom of this page.
Here is a photograph of the same concrete foundation during one of our workshops.
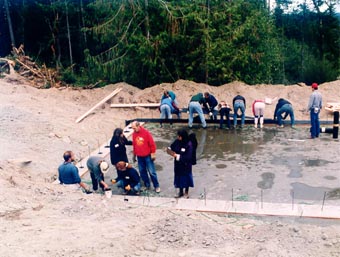
Note also on the footing area to the left that the entire footing is raised above the floor level. This is important, in the event that a water leak or broken pipe floods the inside of the house, the bales will still be protected since they are elevated. This also makes building easier since you don't have to be worried about water getting on the floor during construction. In the photograph you can see some water from a previous day rain that does not affect the bale walls or the construction process.
This can be especially important if you are not going to get your roof on your walls right away. Our trusses and roofing went on the following weekend from our wall raising party so we covered the walls, but did not have to worry about the floor.
Here's the next step:

Note: If you want you can run a string guide line from each corner post as you lay your bales. This may help your wall go up straighter, but may get in the way a little bit.
The rest of the wall will go up quickly. Try not to force bales into walls, this will cause your corner posts and window/door frames to move around or your walls to bow. Snug, but not overly tight. Bales vary in length, you can almost always find a bale the length you need if it is a close fit. Check your corner posts to insure they stay vertical. The next article will talk about window and door frames, laying the rest of your bales and wall tie downs.